home accessories
18 September, 2013
Hand knitted lounge room throw in 'Sage'
Finally here!!! The super chunky throw in sage in now finished. It is knitted with beautiful wool, ordered from England; 25 % wool and 75% acrylic - 110 cm by 160 cm. It is wonderful to snuggle up with... It weights 4.5 kg so it is heavy and very warm.... The weight of this throw coupled with the twisted garter pattern and the beautiful colour of sage, would make it a luxury item in any lounge room. I hope you like it!
25 August, 2013
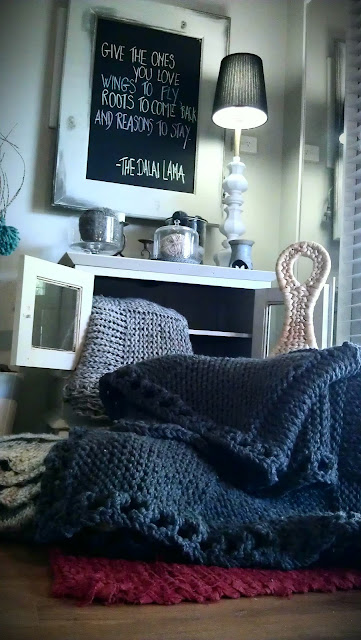
Chunky Knitted Throw in Knit & Purl squares
This adorable lounge room throw was a custom order. Knitted out of British finest yarn, this throw weights 2.8 kg, is 140 cm wide and 170 cm long. Is very soft and supper comfortable to snuggle up with. It is 20% wool and 80% acrylic, washable and easy to maintain. The dark grey colour is very neutral and will go well with any colour in the lounge room.
11 August, 2013
How to convert an old window frame into a chalk board....
This is my new chalk board that serves for the sharing of inspirational quotes,
but also looks very decorative on any wall in our house!
Believe it or not, this used to be an old window frame, now converted into a very decorative and useful piece of art that will stand out on any wall in your home. In this post I am sharing with you the step by step process of how to make a board like this by yourself in your spare time. I hope you try it and enjoy the final product.
STEP 1:
Dust off the old window frame.
STEP 2:
Lay it flat on a surface and do a gentle sanding down, covering the whole frame area.
STEP 3:
Just to make sure that the paint will stick to wood well, apply primer first - this will bond the top coat of paint really well with the wood. Allow 2 hours to dry.
STEP 4:
In order to get the old french provincial look, you can apply a darker colour to the edges of the frame - for this you may want to choose dark grey, black or dark brown. Paint is applied scarcely and whilst wet, you can use a cotton cloth to rub it into the wood. We are after that natural look - aiming away from perfection.
Allow an hour to two to dry.
Now you can measure the size of the window and get the piece of ply-board in that exact size from your local Bunnings or Masters store. Cut the plywood to the exact dimensions. Once you have your ply-board, we can now prepare it for chalk paint. Just like with the frame, we start off by applying the primer, this will make sure that our chalk paint sticks well. Allow 2 hours to dry.
STEP 6:
Now you are ready to apply the black chalk paint. You will need to apply the chalk paint twice, waiting 2 hours in between the coats.
STEP 7:
Meanwhile, we apply the desired colour on our window frame - I used off white colour. We go over the whole frame, even the darker painted corners. As you are painting away, you would use a cloth to rub off some of the colour to show the darker coat underneath that we applied around the edges of the frame. Depending on how it looks, you may want to re-apply the darker colour around the corners and keep rubbing it into the wood until you get the desired effect. Leave overnight to dry.
STEP 8:
Now we are ready to take the glass out of the window frame and fix the newly painted black chalkboard into the frame. Use a staple gun to secure it into the frame.
STEP 9:
You may want to use a hammer to secure any staples that are stubborn and don't want to go all the way in.
STEP 10:
The last thing we have to do is add the cord at the back of the frame so that we can hang it onto the wall. I have used the staple gun for the cord as well, leaving it secure and strong enough to hang onto the wall.
Your Decorative Black Board is Now Ready to Be Used!
Be creative and change your message as often as you like....
GREAT IN THE HALLWAY
I was hoping to make this a useful tutorial, so please let me know if you find it useful and if I missed anything in the instructions.
HAPPY CREATIONS!!!
27 June, 2013
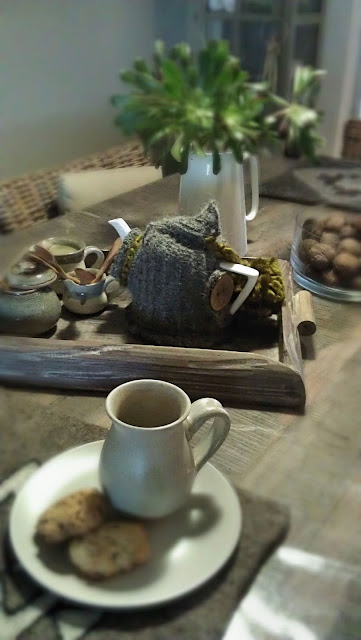
"Cousteau" Tea Pot Cozy
It looks like a diving helmet... we thought... hence 'Cousteau' after Jacques Cousteau, a famous Oceanographer!
Dark grey and sage continues to be the colour combination that dominates my mind. I can never get tired of it... it is calming and yet thought provoking....
This was just a quick project that came out of need. I bought this gorgeous tea pot a while ago that is a little bit skewed and as it was unlikely that I was going to find a tea pot cozy to match it... decided on one of my favorite, free lance knitting... measure-knit, measure-knit... and it worked!
It is a tight fit and it has crocheted edges to give it more definition and add interest.
As you know, all my creations have to have in their content at least one feature that is giant, so this time around- a giant pom pom, so woolly and soft under your hand.
Knitted using a set of round needles and a crochet hook.
BON APPETIT!!!
19 June, 2013
Pattern for Hot Water Bottle Cozy
Here is the range of colour combinations that I played with when knitting this gorgeous 'hot water bottle cozy'. Imagination is your only limitation...
Another sale for this pattern today all the way to beautiful California...
Available to purchase @ (http://www.ravelry.com/patterns/library/entrelac-hot-water-bottle-cozy-2)
Happy knitting & creating to all wonderful artists out there!
Another sale for this pattern today all the way to beautiful California...
Available to purchase @ (http://www.ravelry.com/patterns/library/entrelac-hot-water-bottle-cozy-2)
Happy knitting & creating to all wonderful artists out there!
29 January, 2013
Mr Tea Pot Cozy in a Snow White Winter
I am working on creating tea pot cozies that are featuring the 'giant cable' knit. This lovely wool- in colour 'sage'- came in my recent stock delivery from Great Britain. My new lounge room throw is in the process of being made and I am very, very excited about knitting it and sharing the finished product with you ...
amazing colour sage !!!
I am currently away from hot and sunny Australia, enjoying snow white, idyllic Banja Luka, spending some good quality time with my dear Mum & Dad. I am very much enjoying the snow... haven't seen it nor walked in it for 9 years... so it is a real thrill to be here...
my window view
What can be a better treat in the winter cold days, but a hot cup of tea with some honey and lemon! I made this cozy for my dear Mum & Dad and we had our inaugural pot of tea yesterday. In the spirit of this special occasion, we decided to go for a special flavor, an 'apple & cinnamon' tea. If you add some 'fresh high mountain herbs' honey accompanied with some freshly cut lemon, you have yourself a delicious treat indeed...
royal tea pot cozy in action !!!
CHEERS!!!
17 January, 2013
dark grey and mustard...
This colour combination continues to be on my mind...
Here is a little SunchiB combo - laptop bag and a hot water bottle cozy!
Here is a little SunchiB combo - laptop bag and a hot water bottle cozy!
The laptop bag features an upholstered button and a crocheted button loop which secures the flap.
Featured in the photo is the 2013 BRAND NEW DESIGN for the hot water bottle cozies. This cozy has a shorter closing flap, showing more of an entrelac knitting pattern. Also, the pattern around the collar is the 'seed stitch' pattern which gives a different look.
The sides are joined using seamless sewing stitch, which allows the diamonds to align perfectly.
The cozy is lined up with the felt, securing the pattern in place and preventing the knitting from any stretching. These cozies are gorgeous, my kids are all using them and they very much enjoy snuggling with them when their tummies are aching or during the cold winter nights.
14 January, 2013
It takes a while to befriend the yarn...
This lounge room throw took a while to become what it is today. It is beautiful and I knitted it for myself. ... but this yarn was playing 'hard to get'... it took three attempts to make it into a throw.
Every yarn knits its own story.....
This beautiful English yarn is 82% acrylic, 10% wool and 8% viscose, is very soft in the hand and very elastic, making every stitch pattern spread beautifully. I first attempted to knit a throw in a rib stitch... as shown below...
This stitch looked lovely but there was too much of a stretch horizontally and I felt that the throw would lose its shape if left in this pattern. The next step was to attempt making it into an entrelac pattern throw... one of my favorite patterns...
as per below...
... however, still same feeling was present... there was too much of a stretch in this yarn and it just wasn't going to work. I like the throw to have the softness and elasticity but it is important that the pattern looks protected and well shaped. This yarn wasn't going to deliver that.
So... what to do??? Well, I thought if I combined the yarn with the more sturdy yarn maybe the texture would change; it just needed an additional yarn that would secure the pattern and the existing yarn from stretching too much.
I added a very thin yarn that is 100% wool in a darker shade of grey and that did the trick.
I added a continuous crocheted edging to give it more definition and a finishing touch.
Through hours of experimentation, comes a very cozy and snuggly throw.
Cheers!!!
Subscribe to:
Comments (Atom)


