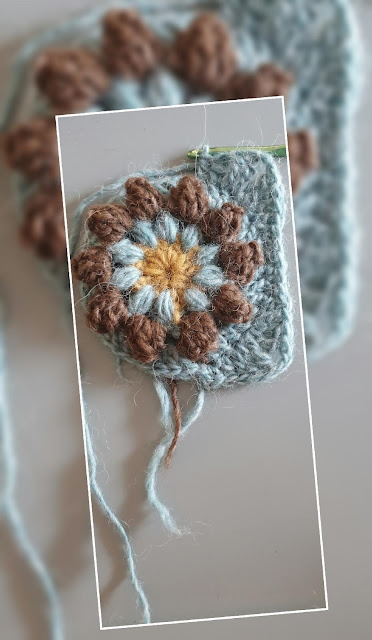
Here is the finished vintage-inspired flower crocheted square. In this blog post, I will share with you step-by-step process of creating one. If you attempt making one yourself, please share with me whether the instructions worked and whether they were easy to follow.
Materials used:
1.) Alafosslopi - LOPI Wool (3 shades: arctic exposure, golden heather
& acorn heather)
2.) a crochet hook (5,25 mm)
3.) a blocking board for crochet squares
Abbreviations:
yrh - yarn round hook
tr - treble crochet
ch - chain stitches
ss - slip stitch
dc - double crochet
htr - half treble crochet
hdc - half double crochet
pop- popcorn
puff - puff stitch
STEP 1, 2 & 3 - Create a foundation chain
Start with a slip knot on your hook and then create 3 chains by working a (
yrh) wrapping the yarn around the hook and drawing a loop through the loop on the hook for each new stitch.
STEP 4 & 5 - Use a slip stitch to form a foundation ring
Once you have your three chains, then insert the hook through the first chain made, wrap the yarn around the hook, and draw a loop through the chain and the loop on the hook to close the ring.
STEP 6, 7, 8, 9 & 10 - Create 10 (tr) treble crochet stitches into the foundation ring.
STEP 11, 12 & 13 Join round with a (ss) slip stitch.
Switch to a different colour ( or for flower here - Alafosslopi arctic exposure shade)
STEP 14 to 25 - Create 10 puffs with 1 ch of separation between each
Create 2 ch and then work ***1 puff into the space between treble stitches (on how to create a puff stitch
CLICK HERE), then make 1 ch, repeat from *** til you have 10 puffs, join round with (ss) slip stitch.
Switch to a different colour ( or for flower here - Alafosslopi acorn heather shade )
STEP 26 to 37 - Create 10 petals by working a popcorn stitch with 3 chains in between each
Create 3 ch, work popcorn in the space between the puffs, ***3 ch, work popcorn, repeat from *** until you have 10 popcorn, join round with (ss) slip stitch.
The flower itself is now finished. In the next step, we want to create a background square for this flower so that it can be easily made into a scarf, a blanket or a shawl or something else you fancy.
CROCHET THE SQUARE BACKGROUND
Switch to a different colour ( or for flower here - Alafosslopi arctic exposure shade)
STEP 1 - Fill in the gaps in between the flower petals
Make 4 (tr) treble crochet stitches in the three chain space between the petals.
STEP 2 - Shaping the background to a square.
We start off by making the corner:
Make 2 ch / hdc** in the next dc / dc / dc + tr / tr, ch2, tr / tr, dc / dc
** hdc - The half double crochet falls in between a single crochet and a double crochet in height, but instead of working off two loops at a time, you draw the yarn through three loops on the hook.
Stitches between the corners:
hdc x 5 times
We connect it now to the Corner #2:
and then reverse the process, dc / dc, tr / tr, ch2, tr / tr + dc / dc
5 hdc between / Corner # 3 / 5 hdc between / Corner #4 / 5 hdc between / ss
How to block your crochet square?
You may find that after you have finished crocheting your square that the corners of your crochet are curled up as you have been handling it for a good half an hour to 40 minutes, so to make sure that your work is straight and even looking, it is best to put your crocheted square through the blocking process.
I invested in a proper blocking board which makes it easy to do, but if you don't have one, there are other ways in which you can do this.
Here is my method:
1.) with a spray bottle, you thoroughly damp the square all around,
especially the corners
2.) depending on the size of your square, you adjust the board pins
in such a way that the square is not too stretched out
3.) leave it to dry (I usually put three at the same time and leave it
over night)
Happy crocheting!


